Age 6 Tier List

Previously:


All cards in Innovation serve some purpose. Some, however, are more powerful in more situations, and others are less powerful in fewer situations.

This ranking attempts to categorize every base Innovation card into four “tiers”. Although every game is unique, and different cards are more important at different times, this ranking considers each card’s average utility in the average 2-player base game. It asks, “How often do I prefer to draw this card, as opposed to my opponent, and how important is that to me?” Sometimes, the most important card for you to draw is Feudalism. Usually, it’s something else.

Top Tier: These are cards to actively seek out because they can form the backbone of your tableau. They are real gamechangers, and almost always either very helpful to you, or very important to deny to your opponent. If the icons permit it, you’d like to use these dogmas as much as you can.

High Tier: These are cards that you are quite happy to draw. They might be a bit more specialized than “top tier” cards, or they might lose their value faster, but they are still important and you would much rather see them on your board instead of your opponent’s. Their dogmas are likely almost always preferable to the basic actions (e.g., drawing), often because they are strictly superior.

Mid Tier: These are solid cards that are OK to meld onto your board, but not part of a long-term plan. Their dogmas aren’t especially powerful, but still better than the basic actions. Mostly they are vehicles to more powerful cards.

Low Tier: These cards are rarely, if ever, useful. Their icons are probably their most redeeming factor, as their dogmas are either extremely specialized or all-around weak, barely better (or sometimes even worse!) than the basic actions. They are the first ones to be returned, and you are probably happy to meld this onto your opponent’s board instead of yours.

Note that not every Age has an equal number of cards in each tier. Within each tier, the cards are only very roughly ordered, as individual circumstances at that point far outweigh the differences in the cards.

Top Tier

Industrialization
Vaccination

Industrialization is probably the most snowbally card in the game.  It is a key card in almost every game, either because you want it or you don’t want your opponent to have it.  It accomplishes so many things at once:

  • It can singlehandedly claim four of the five special achievements (Monument, Empire, Wonder, World)
  • It almost assuredly leads to total icon domination, provided you have some other splaying dogmas
  • It rapidly clears out the piles, allowing you to catch up in tech or run out the piles if you have a score lead
  • And in Echoes, it is just flat-out broken, assuming you have set it up to draw/tuck Echoes cards

Its real drawback is that you aren’t melding anything.  Your top cards stay the same, while if your opponent has Atomic Theory, your pile-clearing is letting them get nicer top cards.  It also doesn’t give you many icons if you can’t splay any other colors besides red/purple.  And it is very dangerous if your opponent also has draw capability and a score lead on you.  Nevertheless, even then, you are probably glad you drew it and he didn’t.

Vaccination would be number one in any other age, but here it has to settle for second-best.  It’s still by far one of the best score-deniers in the game, and the card every early-scoring strategy dreads.  (If you’re way behind in score but have been teching up with Mathematics, it’s often worth it to stop at Age 6 to hunt for Vaccination if you’re in danger of losing.)  Your opponent’s “compensation” isn’t even really much compensation, especially since you get to meld as well.  Its only real drawback is when you overmeld it with a yellow 7.

High Tier

Classification
Atomic Theory
Machine Tools
Canning

Classification is a great way to make use of large hands, be they yours or your opponents’.  It’s a great attack against large hands (e.g., Fermenting), but it’s also just a good way to meld a lot of cards at once.  I often use it on red if my opponent has 6′s, since both of the red 6′s are so good.  You want to use it on green last, obviously.  And it is not advisable to share it if you have a large hand, unless you know for sure that your opponent can’t take anything important from you.

Atomic Theory, like all draw-and-meld cards, gets a high ranking, and the blue splay is just the icing on the cake.  It is slightly buoyed by the fact that both of the blue 7′s are good, so even if you overmeld it it’s not the end of the world.

Machine Tools is about as humdrum and boring of a scorer as you can get, but assuming you have at least a 5 in your score pile, it is a reliable way to get another achievement every turn.  If the early-game scorer can find this, it is often game over.  It goes without saying that it combos extremely well with the score-behind-your-age scorers like Evolution and Democracy.

Canning, like Coal and Steam Engine before it, is a strong scorer (depending of course on your board).  It is a bit more cannibalistic than the others, and so it requires a little more finesse — it’s hard to tech up with, since you might score away your high age cards.  It is a good way to reshape your board if something undesirable was melded onto it.

Mid Tier

Emancipation
Metric System
Democracy

Emancipation doesn’t work well against large hands, but cuan be punishing against small hands.  It scales as the game goes on, and if your opponent only has one card in hand, it is always better to leave them with a random card while boosting your score pile.  Its factories are also key to help Industrialization.

Metric System is somewhat outclassed by Measurement before it, but it is still , and key to securing Wonder or assisting Industrialization.  It is very useful to share to your opponent when he only has one green card, or has his green splayed up.

Democracy is one of the rare lightbulb scorers, and in a multiplayer game can be useful if shared at the right time.  But losing a card to score an 8 doesn’t scale into the endgame, and it gets outclassed by more powerful scorers around this time anyway.

Low Tier

Encyclopedia

It’s like Translation, but even worse.  If you’re melding your highest cards from your score pile, you probably would have just rather melded them all.  It’s conceivably useful if you somehow found a single very desirable high-age card in your score pile, but I honestly don’t think I’ve ever run into such a situation.  Maybe Satellites.

Posted in Age Overview | 4 Comments

Age 5 Tier List

Previously:


All cards in Innovation serve some purpose. Some, however, are more powerful in more situations, and others are less powerful in fewer situations.

This ranking attempts to categorize every base Innovation card into four “tiers”. Although every game is unique, and different cards are more important at different times, this ranking considers each card’s average utility in the average 2-player base game. It asks, “How often do I prefer to draw this card, as opposed to my opponent, and how important is that to me?” Sometimes, the most important card for you to draw is Feudalism. Usually, it’s something else.

Top Tier: These are cards to actively seek out because they can form the backbone of your tableau. They are real gamechangers, and almost always either very helpful to you, or very important to deny to your opponent. If the icons permit it, you’d like to use these dogmas as much as you can.

High Tier: These are cards that you are quite happy to draw. They might be a bit more specialized than “top tier” cards, or they might lose their value faster, but they are still important and you would much rather see them on your board instead of your opponent’s. Their dogmas are likely almost always preferable to the basic actions (e.g., drawing), often because they are strictly superior.

Mid Tier: These are solid cards that are OK to meld onto your board, but not part of a long-term plan. Their dogmas aren’t especially powerful, but still better than the basic actions. Mostly they are vehicles to more powerful cards.

Low Tier: These cards are rarely, if ever, useful. Their icons are probably their most redeeming factor, as their dogmas are either extremely specialized or all-around weak, barely better (or sometimes even worse!) than the basic actions. They are the first ones to be returned, and you are probably happy to meld this onto your opponent’s board instead of yours.

Note that not every Age has an equal number of cards in each tier. Within each tier, the cards are only very roughly ordered, as individual circumstances at that point far outweigh the differences in the cards.

Top Tier

Coal

Coal tops the tables for Age 5 as one of the most powerful scorers in the game.  It wrecks your board, but the game isn’t decided by who has the prettier board.  To see why Coal is so powerful, we have to take a step back.

In the race for score achievements, there are generally four steps:

  1. Score enough points for the achievement
  2. Tech: Draw a card of the achievement’s age
  3. Tech: Meld the card of the achievement’s age
  4. Claim the achievement

The observant eye will notice that there are four steps here yet only two actions in a turn.  Therefore, anything you can do to cut down on the number of steps will help you claim those achievements faster.  In that one turn’s difference, your opponent might land Vaccination or tech to Rocketry.

For example, Metalworking will often draw you a card of the achievement’s age, thereby combining (1) and (2).  A card like Sailing will get you (2) and (3).  Teching up multiple ages at once (e.g., using Metalworking to clear out both Age 1 and Age 2 before melding an Age 3 card) saves tempo on a macro level.

But it is the rare card that can handle (1), (2), and (3), and that is where Coal comes in.  Not only does it score, but its draw-and-tuck becomes a draw-and-meld once you destroy your board enough.  Sure, you’ll be behind on every symbol, but who cares?  You’re scoring way faster than they are, and unless they have Rocketry, no attack can really hurt you.  Vaccination is thwarted by the fact that you aren’t scoring a uniform card number (like how Lighting always scores 7′s).  Once you can consistently turn it into a draw-and-meld, Coal is by far the fastest scorer/achiever in the base game.

High Tier

~The Pirate Code
Chemistry
Physics

~The Pirate Code largely depends on your green cards, the most common source of crowns.  If you have enough green cards to sustain it, then it will absolutely wreck your opponent’s score pile.  It is most dangerous against someone who has been scoring 3′s and 4′s with something like Pottery: transferring two 4′s is a 16 point swing, not to mention the added bonus from scoring your own crown cards.

Assuming you had scored some 1′s, Chemistry is guaranteed to score you at least 5 points.  It’s a solid scorer, especially since 5 points is the difference to the next achievement.  Plus returning cards from your score pile is somewhat convenient (follow Chemistry with a shared Sailing; avoid ~The Pirate Code), and if your opponent has no score pile you can share Chemistry freely (and still claim the sharing bonus!). Chemistry can also be an unexpected game-ender if you have a 10 on your board.

Physics is a very strong way to draw 6′s, one of the most important Ages in the game.  On the first use of Physics, it has 8/9 * 6/8 = 2/3 odds of not flipping the same color.  On the other hand, once you fail with Physics once, subsequent uses are even more likely to fail.  Of course, it is a good thing to share to your opponent if you want to empty their hand, but it can be extremely risky if it backfires!

Mid Tier

Measurement
Steam Engine
Banking
Astronomy

Measurement depends entirely on whether you can.  Optimally, you can draw a 10 as early as Age 5, but your odds of that are quite low.  More realistically, it’s a great followup to Classification or Industrialization.  And even if you can’t use it to tech, it’s a fine splay-right that simultaneously cycles your hand.  In that sense it is generally preferable to Metric System.

Steam Engine is a lot like Coal, but doesn’t quite match up on the tech-up-through-board-cannibalization front.  It’s a nice scorer but probably not ideal.  Canning, which is very similar and just one age away, is a much superior yellow factory scorer.

Banking is a very strong “I demand” effect neutered by a crippling compensation clause.  Letting your opponent score a 5 is almost never a good idea: even if they aren’t competitive in score right now, they might be soon.  It can be good for stealing a key top card (Coal, Industrialization) if it’s the only one they can give you, but otherwise is just too dangerous.

Astronomy has a 4/10 chance of being a draw-and-meld, and it’s a fine way to sneak in an extra achievement later in the game if you still have Astronomy on your board for some reason.  But it is hurt by the fact that Encyclopedia and Metric System are so underwhelming.  It does do quite well when your board is very depleted, however, since it’s then easier to claim Universe.

Low Tier

Statistics
Societies

Statistics is a pretty weak score attacker unless your opponent has no cards in hand, and even then it isn’t very spammable like Vaccination.  It is most useful against Chemistry and Evolution, but otherwise generally a dud, a card useful primarily for its splay-right, for its symbols, and occasionally for a desperation score attacker.

Societies is a fine “I demand” effect because it doesn’t give much compensation, but it also doesn’t really have any good targets.  There are not that many key lightbulb cards at this stage in the game, and lightbulbs are so ubiquitous that it’s rare that you’ll actually get the card you want.  Of course, once in a while, you’ll find a great target for it, but keeping Societies as your top card in hopes of finding a use for it is probably not the winning play.

Posted in Age Overview | 2 Comments

Age 4 Tier List

Previously:


All cards in Innovation serve some purpose. Some, however, are more powerful in more situations, and others are less powerful in fewer situations.

This ranking attempts to categorize every base Innovation card into four “tiers”. Although every game is unique, and different cards are more important at different times, this ranking considers each card’s average utility in the average 2-player base game. It asks, “How often do I prefer to draw this card, as opposed to my opponent, and how important is that to me?” Sometimes, the most important card for you to draw is Feudalism. Usually, it’s something else.

Top Tier: These are cards to actively seek out because they can form the backbone of your tableau. They are real gamechangers, and almost always either very helpful to you, or very important to deny to your opponent. If the icons permit it, you’d like to use these dogmas as much as you can.

High Tier: These are cards that you are quite happy to draw. They might be a bit more specialized than “top tier” cards, or they might lose their value faster, but they are still important and you would much rather see them on your board instead of your opponent’s. Their dogmas are likely almost always preferable to the basic actions (e.g., drawing), often because they are strictly superior.

Mid Tier: These are solid cards that are OK to meld onto your board, but not part of a long-term plan. Their dogmas aren’t especially powerful, but still better than the basic actions. Mostly they are vehicles to more powerful cards.

Low Tier: These cards are rarely, if ever, useful. Their icons are probably their most redeeming factor, as their dogmas are either extremely specialized or all-around weak, barely better (or sometimes even worse!) than the basic actions. They are the first ones to be returned, and you are probably happy to meld this onto your opponent’s board instead of yours.

Note that not every Age has an equal number of cards in each tier. Within each tier, the cards are only very roughly ordered, as individual circumstances at that point far outweigh the differences in the cards.

Top Tier

Gunpowder
Enterprise
Anatomy
Reformation

Age 4 is a doozy, and we kick it off with one of the most influential cards in the game.  Gunpowder is the card that everyone warns you about when you first learn Innovation, and for good reason.  Tech to it early and it does maximum damage to your opponent; draw it “naturally” and it scores much more.  Gunpowder means that you better be backing off of castles by Age 3-4, and is the earliest reason why factory control is so important.

Enterprise is easily the best of the Mid Age “crown-stealers” (Compass, Banking, Societies), and the best board-destroyer in the game until Age 8:

  1. It is virtually unstoppable because it steals crown cards and also splays your green cards right (revealing even more crowns), thus ensuring dominance in a key icon as well as continued use of Enterprise to your heart’s desire;
  2. It is the only one where the “compensation” is usually a negative for your opponent;
  3. Quite a few key cards have crowns on them.

Anatomy is another dangerous leaf attack, following Machinery.  There are two different kinds of attacks in Innovation: some are strong demand effects balanced by good compensation to the victim, and others are specialized demand effects balanced by the fact that they’re only strong in certain situations.  (There are also demand effects that are just never strong, like Feudalism, which as always can be safely ignored.)

Anatomy falls into the latter category.  You mainly want to use it when your opponent has few and high cards in his score pile — against someone who scored with Metalworking, for example, it’s probably not effective.  It’s especially strong against the late-game scorers; for example, Chemistry and Lighting are both especially vulnerable.

Reformation is mostly in here because of Fermenting and the F/R/X combo; that having been said, there are many reasons you might end up with a big hand, and Reformation is a very good way to make use of those cards (tucking while simultaneously splaying).

High Tier

Printing Press
Experimentation
Navigation

Printing Press is a heavily luck-dependent card.  In any given age, if you draw the purple card too late there’s not much point to Printing Press since you’ll soon be getting there naturally anyway.  It’s mainly useful when one of your first cards in a new age is purple and you can use PP to leap ahead 2 full ages.  And of course, if you land on another purple, you’ve just teched ahead 4 ages in two turns.  It’s one of the reasons that even some early scoring, no matter how minimal, can be helpful later on.

Experimentation is your standard draw-and-meld, with a slight bonus as a mild techer if you get it early enough.  Generic draw-and-meld cards are almost always going to be high-tier or better, since they are so all-around useful.  As an added bonus, its dogma icon is lightbulbs — it’s a very useful forced share against someone who has teched up really far, and who probably has a lot of lightbulbs.

Navigation is a strong, simple score attacker, especially when your opponent has used Metalworking or Clothing to score a lot of 2′s and 3′s.  It won’t catch you up against someone who is far ahead on score (you’ll need something stronger like Vaccination or Rocketry for that), but it’s very useful if the two of you are in a tight scoring battle.

Mid Tier

Colonialism
Perspective

Colonialism is most commonly used to defend your board against Gunpowder.  On its own it is decent if you have a use for the tucked cards, like if you’re splayed.  Based on your age, there’s a decent number of cards with crowns and therefore good odds of tucking multiple cards.

Perspective is one way to make use of a big hand, though probably you would rather convert your Fermenting hands into Reformation tucks instead.  Still, given even a few light bulbs, it is a potent score-from-hand card that maintains its usefulness into later ages.

Low Tier

Invention

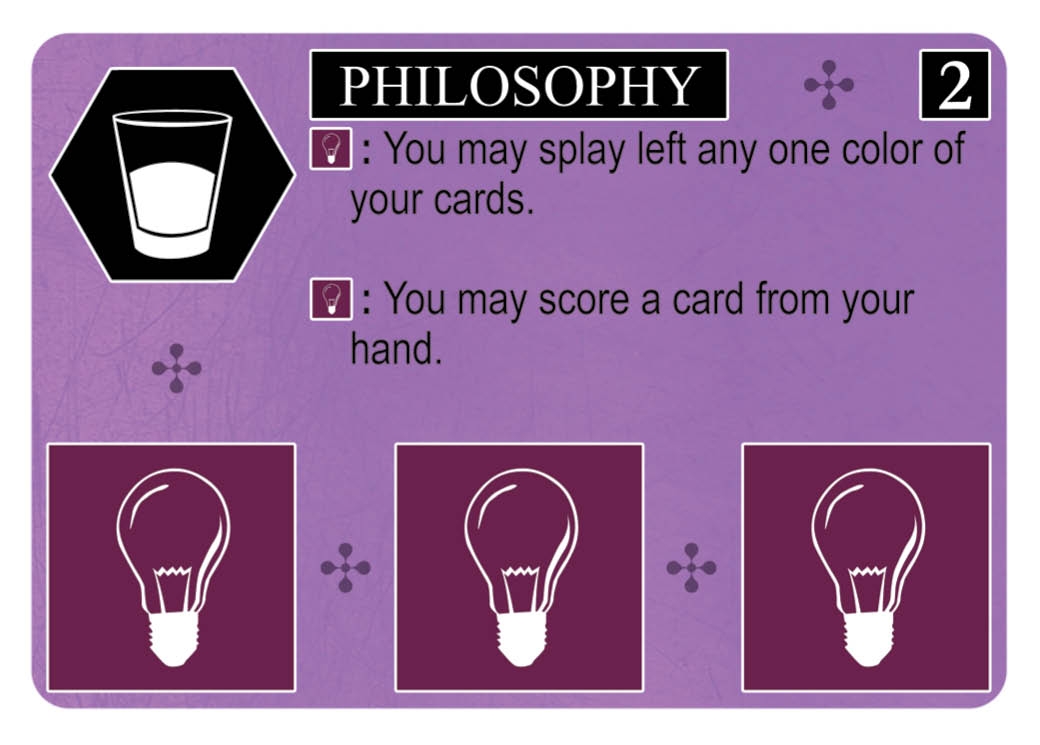
Invention is probably the worst card in Age 4, mainly because it’s just too specialized.  At best you’ll be able to use it 5 times; more commonly, you’ll use it 2-3 times at most.  It’s occasionally nice for sneaking in a surprise Wonder, but it doesn’t actually help you make progress towards Wonder since you can’t splay unsplayed piles.  Its primary use is as a followup to Paper or sometimes Philosophy; you can sometimes use Philosophy / Invention as a combo scorer (splay left with Philosophy, score from hand, splay right with Invention, score a 4, repeat) if you were going to keep using Philosophy anyway.

The factory on Invention can be key, however.  There are only three factory cards in Age 4; if you meld Gunpowder and your opponent defends with Colonialism, Invention is the only way you’ll get to fire your Gunpowder before Age 5 and before your opponent has a chance to cover up his castles.

Finally, in Echoes, where splay left is significantly more useful, Invention is a lot stronger.

Posted in Age Overview | 11 Comments

An Introduction to Echoes of the Past

This is a featured forum article by Hideyoshi.

Echoes of the Past

Echoes of the Past

There are more and more people starting Innovation, and some are already experienced players or even experts in the base game. Some may want to start Echoes after playing a lot of the base game, so I would like to write some strategy guides about Echoes.  I am not an expert in Echoes game, and I am not even in the top five on Isotropic (normally sixth or seventh, anyway). But I just want more people to enjoy the strategy in Innovation, so I will share some strategy from my experience.

Anyway, I will write articles for Echoes cards per age, and I’ll start with a basic strategy guide. I assume that all of you know about the base set strategy already, such as the importance of scoring, teching, and board building. If you do not know much about the base set, please stop here and play base first; otherwise, Echoes will be a lot for you.

A quick reference to all cards: text | images

New features and new strategies

1.   In the base game, you can win the game at age 4 with six achievements, but in Echoes generally you cannot win so early (at least I have never tried to do so). It is because it is not quite possible to get 7 achievements so early on. But you may find that in Echoes games, it is easier to end the game earlier, around Age 7, because there are 5 new special achievements that are often claimable by Age 7.  Teching and building your board therefore becomes much more important than in base: Age 7 Echoes cards, at least, are really strong, much stronger than their base set counterparts.

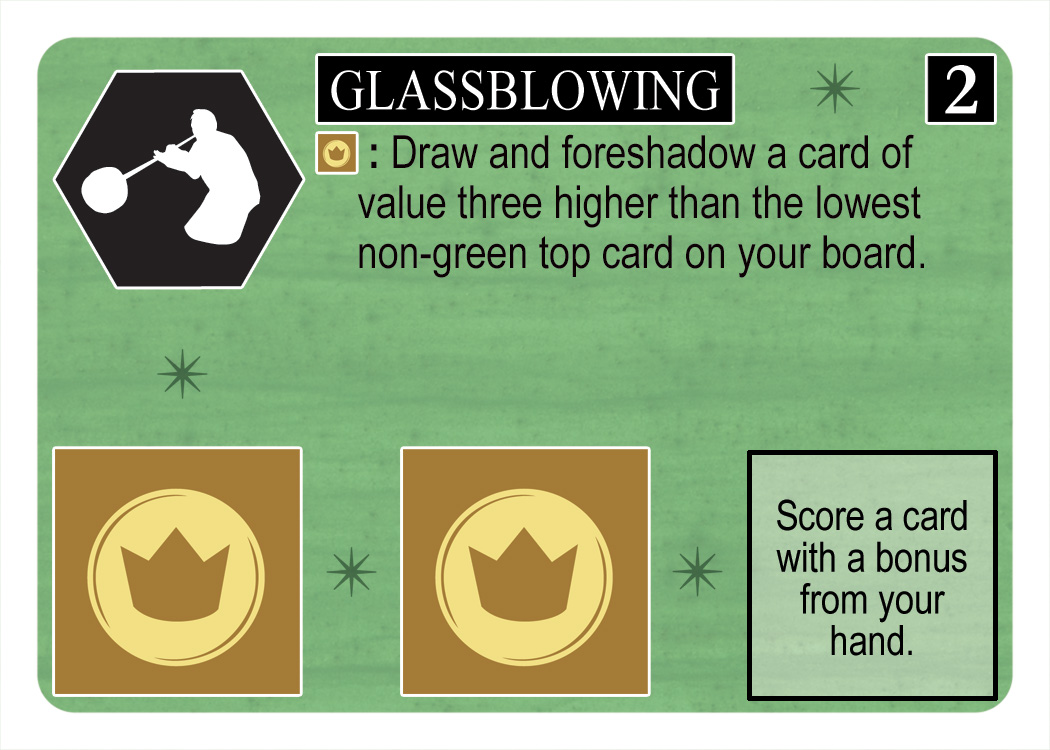
2.   Forecasting is a new feature. You may consider forecasting as setting a trap for your opponents, or a sudden attack. It is often good to forecast and foreshadow, but it is often not a good idea to foreshadow as your sole dogma in one action.  It is a common mistake for beginners to foreshadow some high tech cards without actually teching up (such as using Glassblowing to foreshadow a lot of 5′s at Age 2). In reality, you are not accomplishing anything at this stage. Your opponents will be scoring and claiming achievements as you waste time.  I advise beginners to foreshadow some cards that you may forecast shortly, but not to forecast a card with too high a value. Moreover, you should not focus on foreshadowing 7 cards to claim Destiny.  Perhaps as a last resort, but it is not easy to claim, and I often consider claiming it to be wasting time in fact.

3.   Echoes effects are the second feature in the game. It makes splaying even more important.  However, remember that echo effects take the place of icons for your board.  If you focus too much on echo effects, you may lag behind in icons.

4.   Bonuses are the third feature. They are very useful for a little bit of score, but they won’t save you if you are far behind.  Do remember that only the highest bonus counts as its original value, and all others only count as one.  Similar to echo effects, bonuses can reduce the number of icons on your board.

5.   Some specific new effects are introduced in the game: chief among them, “making” more achievements to be claimed. Some cards can return some cards as new achievements: Chopsticks, Toothbrush, Seed Drill, and Ice Cream.  Among these four, Chopsticks is generally the most scary as you can easily claim a lot of 1′s. Some cards may just achieve some cards in play, such as Soap and Hot Air Balloon. Make sure you have enough score and a top card to claim it, however!

6.   Due to the new drawing system, you must carefully manage how to draw Echoes cards.  Forcing your opponent to draw an Echoes card can often ruin his plan of using Industrialization to tuck multiple Echoes cards at once.  Generally you can only have one Echoes card in your hand at a time, unless you steal your opponent’s hand.

7.   There are more different strange effects. They may not be all strong, but they are quite new to the games. Some effects involve randomness, such as Dentures and Shrapnel, which you may not know which color is really scored until you use it. And some strong effects show up earlier, like Homing Pigeons.

8.   There are more cards that let you win suddenly, but these cards are generally more difficult to do so than the base cards. (And some cards are really just a sudden attack, such as Saxophone and Rock.) I would remember them, but they should not be your goal.

9.   Last but not least, keep in mind that Echoes cards are not always more useful than the base cards. Some of them are really powerful, but not all. You may still get some dummies in Echoes, even in Age 10.

Posted in Echoes | 7 Comments

From Level 5 to Level 30

This is a featured forum article written by timchen.

There was a time when I thought Innovation is not a very skillful game: I thought it was too swingy, too luck-driven.  At that time I also had trouble improving my record against the AI; I hovered around 50-50, and I just assumed the game is just like that.

How wrong I was.

As it turns out, there is a healthy skill curve in innovation. Near level 30, now I can beat level 5′s probably 6 out of 7 times; on the other hand, my record against level 40′s is miserable. Of course, the game is still swingy, and sometimes comes down to drawing one or two key cards, but overall, skill plays a much bigger role in this game than I had thought.  So, what is the difference between a good player and a bad one?

Here are a few observations from the games I’ve played. They can roughly be categorized in the following three different categories:

1. Understanding the game flow

This part probably makes the most difference. Lots of mistakes are made because the player does not realize that different dogmas are not made to be equal. Here are some typical examples one should probably never do in the early game:

  • Use Code of Laws when you are still in age one, or when you have no immediate benefit from doing so.
  • Use Agriculture/Pottery to score one or two points.
  • Dogma Writing without a share.
  • Continue to draw when opponent has Clothing.

To understand why, one can look into three different aspects of the game:

(i) Early scoring and achieving is potent. 

An early achievement denies one achievement for your opponent. Furthermore, with enough score, teching is achieving. This is why Clothing and Metalworking are the most important scoring cards in age 1. They score the cards in the drawing pile and therefore help you tech at the same time. On the other hand:

(ii) Icon dominance is crucial for the mid game.

To be more specific, in order to block/support Fermenting and Machinery, one needs a few leaves to be on the board.  You’ll want crowns for Compass/Enterprise/Banking.

This is one of the reasons why Metalworking is so strong: it essentially guarantees you a good source of the midgame icons.  For example, Pottery is an extremely important age 1 card that is actually stronger later, when the lower piles are empty, and Metalworking can help do that.  In contrast, scoring by Pottery or Agriculture does not improve your board at all, and is very slow early on.

(iii) Don’t play for a specific card unless you have it.

Before going into this, we should note a few things. Firstly, splaying left is not very useful. More often than not you just get one more castle, which does very little even for dominating castles since many cards offer 3 castles. Using one action (and one potentially useful card!) solely for this purpose is probably not a good idea. In fact, splaying left in the base game is mostly only for one specific card: Paper. But using Code of Laws repeatedly does not help you draw it.

As I have discussed here, starting immediately with Writing and drawing into twos is generally not very promising. At best you can grab Mathematics or Monotheism when your opponent is not going for castles. In addition, leaving your opponent in age one with those two-in-one cards (The Wheel, Domestication, Sailing) as well as potent cards such as Clothing and Metalworking is just bad.

Going so much into specifics of the early game, let me go back and comment on the generalities of the game flow I perceive. In age 1-3, it’s a competition of massive scoring, and icons (especially leaves) on the board. It is probably reasonable to say that if one loses on both front (or just horribly on the first) the game is mostly lost.

In the middle ages 3-7, the game is more of a mixture, depending really on what you draw. If the game is more or less tied going into this era, then crowns and factories become more important. On the other hand during this period one hardly has time to build up his board, and it is more about better execution and tactics with regard to the specific draw in the game.

In the late ages 8-10, there are a few types of competitive games: one is a techer trying to cash in by scoring/achieving or drawing 11 before his opponent can get 6 achievements. Another type is the icon dominating player playing catch-up on achievements; in this case he usually tries to kill off his opponent’s score pile, gain control, and achieve for himself. His main threat is often from his opponent drawing into those late age nasty clock or non-demand attack cards (e.g., Rocketry). If two players enter this era on more or less equal footing, then the game is probably on a coin flip.

2. Timing and efficiency

After understanding the game flow, one realizes there are a few actions that are just wrong to take. Beyond that, however, sometimes there are a few reasonable actions to take. To decide between which, it is all about timing and efficiency. For example:

(i) When you want to dogma an action in hand exactly once in the near future, you probably should not meld it using the second action in your turn. 

This is because by not melding it you do not give your opponent time to prevent it. Typical examples are Engineering and Machinery, but it also applies to Compass, Enterprise and so on.  Sure, a better opponent would probably play prophylactically to prevent it, but other times they will rely on their luck hoping that you have not drawn those cards yet. Melding it just gives those chances away.

(ii) When you achieve, you have just wasted an action if your opponent is not in a position to achieve or to threaten your score.

This one is pretty simple, but I see this error all the time. In age 1-3, one cannot score more than 4 points using a single action except using Clothing or Metalworking. So if your opponent is more than 4 points away from the achievement you are trying to achieve, he cannot grab the achievement next turn. Achieving here is clearly not the most important thing to do, and one should probably treat it as sort-of a last resort (comparable to draw a card) in this scenario.

The reason is that although you eventually need to achieve it, the opportunity cost could be significant.  For example, if you are on a Clothing tear, scoring 4+ points per activation, there is no need to stop and claim an achievement if your opponent has no way of threatening your score (e.g., Mapmaking) or scoring for himself (e.g., Metalworking).  You may as well continue to use Clothing while you can, and only after he catches up in colors do you go and claim the achievement (now that you can’t score any more).

(iii) When to claim special achievements (e.g., World via Translation)?

It depends on a few things.  If you already have the board set up for it, by all means, take it unless you have some other big opportunity.  If you want to set the board up for it anyway (I am thinking mainly of Empire via Construction here — you want to fill up on colors anyway), then that’s also a fine thing to do.

In addition, they are most helpful to you when you are playing the role of the early scorer.  It is only speculatively helpful if you have no score and no other achievements; it is extremely helpful as the early scorer, because now you only need to claim {1} through {5} (or if you’re very lucky, {1} through {4}), giving your opponent a lot less time to find the power cards to catch up or destroy your score.

Otherwise these achievements are less important than the regular achievements.  Empire, World, and Universe are a lot less likely to be claimed by your opponent than the {1} or {2} achievement, and so when you claim them you don’t get the added benefit of denying it to your opponent.  Monument and Wonder are different as they are claimed in most games.

3. Do not miss your chances!

Sometimes your opponent cannot help but just have to leave a giant opening for you. Take advantage of those opportunities, and do not let them slide by!

(i) Dogma Clothing if it can score 3+ or 4+ points, even if you have nothing to meld. This one is just sooo big.  I see many players not use Clothing when they have nothing to meld.  The melding is just the bonus — the real point of the card is the scoring!

(ii) If you draw into Coal/Canning early with factory dominance and a shot at taking achievements, spam them!  People are often too attached to their boards, but most of the score-from-your-board dogmas are very strong.  (Genetics, of course, is the granddaddy of all of them.)

(iii) Return a 1 and then share Sailing/Mysticism. Share Domestication when opponent still has useless 1′s in hand.

(iv) Compass/Enterprise/Road Building shenanigans.  They not only allow you to take a good card, the “compensation” also might cover up another good card.

(v) sharing Alchemy and Physics.  Oh, you drew 10 cards last turn with Fermenting?  Try some Physics … possibly giving them 3 cards is nothing if they are drawing that much, but returning their whole hand is incredible.  (This is especially cruel with Railroad!)

There are probably some little things here and there that I forgot to mention, or I didn’t find appropriate places to fit them in. Maybe I’ll eat my words when I am at a higher level. But if that is the case I certainly hope those higher ranked players come out and make me eat my words!

Posted in Uncategorized | 18 Comments

Age 3 Tier List

Previously:


All cards in Innovation serve some purpose. Some, however, are more powerful in more situations, and others are less powerful in fewer situations.

This ranking attempts to categorize every base Innovation card into four “tiers”. Although every game is unique, and different cards are more important at different times, this ranking considers each card’s average utility in the average 2-player base game. It asks, “How often do I prefer to draw this card, as opposed to my opponent, and how important is that to me?” Sometimes, the most important card for you to draw is Feudalism. Usually, it’s something else.

Top Tier: These are cards to actively seek out because they can form the backbone of your tableau. They are real gamechangers, and almost always either very helpful to you, or very important to deny to your opponent. If the icons permit it, you’d like to use these dogmas as much as you can.

High Tier: These are cards that you are quite happy to draw. They might be a bit more specialized than “top tier” cards, or they might lose their value faster, but they are still important and you would much rather see them on your board instead of your opponent’s. Their dogmas are likely almost always preferable to the basic actions (e.g., drawing), often because they are strictly superior.

Mid Tier: These are solid cards that are OK to meld onto your board, but not part of a long-term plan. Their dogmas aren’t especially powerful, but still better than the basic actions. Mostly they are vehicles to more powerful cards.

Low Tier: These cards are rarely, if ever, useful. Their icons are probably their most redeeming factor, as their dogmas are either extremely specialized or all-around weak, barely better (or sometimes even worse!) than the basic actions. They are the first ones to be returned, and you are probably happy to meld this onto your opponent’s board instead of yours.

Note that not every Age has an equal number of cards in each tier. Within each tier, the cards are only very roughly ordered, as individual circumstances at that point far outweigh the differences in the cards.

Top Tier

Machinery

No Age 3 card even comes close to the power of Machinery.  It is an ultimate shutdown to both hand-size strategies and tech, and it remains a powerful weapon throughout the game.

Machinery is really the best counter to Fermenting, but if they’re drawing big with Fermenting you are probably not going to have the leaf advantage to steal their hand.  So more realistically, it is a counter to The Wheel, Mysticism, and Paper.  But it’s also very useful against tech: Printing Press, Mathematics, etc. can all be caught off guard by a surprise Machinery.

Now, yes, you do give compensation in the form of your highest cards, but:

  1. Maybe you have no cards in hand;
  2. Maybe your highest card is a lot lower than his cards;
  3. Maybe your one crappy 5 is worth all of his 4′s.

The first time I use Machinery, I like to meld and execute it on the same turn so that I can get maximum surprise value out of it.  You don’t want your opponent to see Machinery coming and get rid of his hand before you’re able to steal it.

Subsequently, Machinery left out on your board is a gigantic threat to your opponent.  Unless they can get leaf superiority, they can’t risk building up their hand.

Finally, the “score a card from hand with a Castle and splay your red cards left” dogma is kind of unnecessary.  Scoring dogmas are always nice, but you could leave it off and Machinery would still be a strong card.  And a splay-left is not terribly useful at this point in the game.

High Tier

Optics
Alchemy
Paper

Optics is your standard “draw-and-meld”, always a strong dogma, except it has the added bonus of scoring points for (possibly) you and (possibly) your opponent.  Ignoring the card removed for the achievement, Age 3 has 4/9 cards with Crowns on them (note that you can’t meld Optics with Optics!), Age 4 and 6 have 4/10 cards with Crowns, and Age 5 has 5/10 cards with Crowns.

So in Age 3, you’re scoring 4 points 45% of the time and losing a card from your score pile 55% of the time.  Assuming you have 1′s in your score pile (and you don’t already see all the crown cards gone), this is a good deal to take because you’re netting 1.25 points on average.  This doesn’t sound like a lot, but:

  1. If you’re behind on points, there’s no chance of you giving away points.
  2. If you’re at 11 points, and have claimed achievements 1 and 2, gaining 4 points is considerably more important than the possibility of losing 1 point, because it represents the next achievement.

That having been said, be very careful about executing Optics when:

  1. you are ahead in points;
  2. you don’t have low cards in your score pile to give away;
  3. you are sharing it with someone who has fewer points!

Finally, Optics, like most other draw-and-meld cards, is very powerful when shared if you can “stack the deck” by returning certain cards.  It is doubly effective: you can force your opponent to cover up a good card with an obsolete/inferior card while simultaneously transferring you a card from their score pile.


Alchemy is paradoxically one of those cards that gets better with fewer of its dogma icon on the board.  With only the two castles from Alchemy itself, it is a simultaneous “meld-and-score-from-hand”, the only one in the game and quite useful for simultaneously teching up and scoring.  The process of claiming achievements is intentionally designed to take three steps: score, tech up, and claim; with Alchemy potentially handling two of those steps, you can get through the whole process in a single turn.

With three castles, Alchemy is even better than a draw-and-meld, since you get to choose what card you want to meld, and then score a card on top of that.  Of course if you have no hand, then Alchemy is just a draw-and-meld, a fine dogma, especially considering it’s even a mild techer.

With six castles, Alchemy starts to get ridiculous, since even if you have no cards in hand, Alchemy is a draw-and-meld-and-draw-and-score, and you even get to choose which you want to meld and which to score.

With nine castles, Alchemy will probably cost you your hand.  But who knows!  Maybe you’ll be lucky and evade Colonialism and Gunpowder.

The reason Alchemy isn’t higher is because it will eventually run into those red cards, and once you do you’re often left with little choice but to manually draw through them while your opponent has teched up to 5 or 6.  But it’s quite useful all game long, even from the higher ages, especially once the red cards are confirmed to be gone.

Plus, a shared Alchemy is a hilarious way to destroy your opponent’s hand.


Paper is another mass-drawing / mild-teching card, made worse by the fact that you have to have your cards splayed left plus another card that helps you splay left more colors than just green and blue.  It segues beautifully into Invention, and is a killer combo with Code of Laws and Philosophy, but that requires you to have some pretty bad cards on your board.  That being said, a 5-card drawing Paper will help you find good replacements for those cards pretty quickly.

Mid Tier

Compass
Translation
Education
Medicine
Engineering

Compass is basically the ultimate counter to the Fermenting/Reformation combo, as well as Machinery.  Otherwise it is fairly useless because of the compensation clause; note that red doesn’t have leaves, so they’ll always at least be able to take a red card from you.  On the other hand, if you can set up your board such that they can only take a very bad card (or no card at all, if you have no red), then it’s a decent board-destroyer.  It can also be used to fuel your own leaf strategy.

Translation is useful for some shenanigans with your score pile, though of course the bigger your score pile the less interested you are in eliminating it.  Sometimes you have some really good cards in there and you don’t think you’re contending for achievements anyway; more commonly, it is a sneaky way to grab an extra achievement (World).  All else being equal, it’s preferable to keep crown cards in your score pile for this reason (e.g., give away Masonry instead of Oars).  Alternatively, you don’t have to meld your score pile to claim World, though that requires you to either be quite lucky or have few cards on your board.

Education is a good way to tech up fast at the cost of score.  To make it worthwhile, you probably want to score two cards from the next age that you and your opponent are on (e.g., with Agriculture, Chemistry, or Optics), claim an achievement, then Education into a 3-age tech lead with plenty of cards left in the supply between you and your opponent.  It’s not the easiest thing to set up, however.  If you take too long, you end up losing score while not getting much of a tech advantage.  Education is sort of a one-time techer, so you really have to make the most of it and get several ages ahead, otherwise your opponent will just quickly catch up.

Medicine is a sneaky way to steal high score cards from your opponent, useful against something like Chemistry or Evolution.  But it doesn’t get particularly strong until your opponent is scoring very high cards, and until then it usually only translates to a 2-point gain or so.  It is mainly useful when both of you are contesting achievements.  And it becomes a real beast in multiplayer, provided you have enough leaf advantage and low cards to give away.

Engineering is a bit of a paradox.  You need to have more castles than your opponent, but it’s not worth the trouble if your opponent has few castles.  Plus being so far ahead in castles is a little dangerous, what with Gunpowder right around the corner.  Accordingly, it’s most helpful when you have a lot of splay-lefts that give you a slim castle advantage against a high castle count.  It wipes the entire board, which is a lot more devastating than Gunpowder board-wise because they can’t choose to give you some other card to prevent you from scoring their key cards like Fermenting and Machinery.

Low Tier

Feudalism

Poor Feudalism.  It gets lampooned in the header of every single one of these tier lists.  But you know, its reputation is well-deserved.  It steals only the worst cards.  This would be mediocre even in Age 1.  In Age 3 it is just a joke.

I mean, just compare it to Machinery.  Instead of taking your opponent’s entire hand, you take a single card, probably one of their worst.  And the fact that you can splay yellow and purple left is almost an insult, given that it comes way too late to be useful, and that yellow and purple are the two worst colors to splay left.

This is around the point where I usually say, “so it’s only useful for the icons”, but even its icons are awful!  At this point there is little point to melding castles (if anything, it’s just more exposure to Gunpowder), so basically its only use is a single leaf.  I would gladly meld this all day every day over any purple card on my opponent’s board.

Really, it hardly deserves to be even in the Low Tier.  Perhaps there should really be a basement tier, a place where Feudalism and Miniaturization can commiserate with each other.

Posted in Age Overview | 15 Comments

Drunk Protestants: The Power of Fermenting / Reformation / X

This is a revised version of a featured forum article written by Hideyoshi.

Hello everyone~ This is my first attempt at writing on some common/uncommon cards and combos in Innovation. To start with, Fermenting/Reformation is a very common combo in base set and even echoes.  They are powerful cards that arrive early in the game and they have a strong impact on the rest of the game flow.

The basic mechanism

Fermenting is not always a good card. It needs a lot of leaves in order to draw lots of cards. If you have no leaves on your board or in your hand, you’d better forget Fermenting even if you draw it.

There are three steps to the Fermenting/Reformation/X combo.

The first step is the Fermenting part.  You want to use it to draw a lot.  For this, you’ll need leaves.  The key source of leaves early on is going to be Pottery/Calendar, Clothing/Sailing, and Code of Laws if you need it to get to an even number.  Once you have that, use Fermenting to start drawing like mad.  Your main target is Reformation, though as mentioned below, you’ll hope to pick up some of the counters to F/R/X as well.

The second step comes once you get Reformation and are reasonably safe from possible counters.  Now you want to start tucking.  Obviously you want to focus on tucking leaves; you also want to tuck in colors you have splayed.  Yellow cards get splayed by Reformation and often have leaves, so that’s an obvious choice.  If you can manage to tuck 6 cards in a turn, you can pick up Monument along the way.

The third step is Fermenting again, but this time you are looking for X.  What is X? Basically, some way to make use of your hand.  We’ll get to that soon.

How to set up the best board – before Age 4

In order to set up the best board for this combo, you have three things to keep in mind:

  1. You want more leaves;
  2. You want to do it as fast as possible, which means avoiding useless actions like inefficient splaying;
  3. You need to either draw or icon-block Engineering, Compass, and Gunpowder.

Before Reformation, you usually max out at 8 leaves: Fermenting, Clothing, Pottery, and Code of Laws.  (Feudalism also has a leaf, but in Age 3 I tend to prefer drawing more cards.  The exception is if you need the castles to block Engineering from eating your Fermenting.)  Sometimes you see people splay left the green cards to get to 10 leaves (adding Sailing and Compass), but this is usually inefficient.  Those are the only two green cards with leaves, and later on the greens offer few useful symbols if splayed left.  Much better is just to draw with Fermenting.

Eight leaves is the best case scenario, but it requires some lucky draw.  Six leaves is more common, with some combination of Fermenting plus Clothing, Calendar, Pottery, and Code of Laws.  With 6 leaves, Fermenting is still pretty strong draw.  But if you can’t make it to 6 leaves, then I wouldn’t count on Fermenting unless you have literally nothing else.  If you draw more leaves, or if Reformation falls into your lap anyway, you can reconsider, but using Fermenting for 1-2 cards is not nearly as strong.

As you approach Age 4, consider how to optimize your Age 4 draw. Try to time a big Fermenting push right as Age 4 opens up, so you can maximize your chances of drawing Reformation.

How to set up the best board – after Age 4

Assuming you grab Reformation, it’s time to tuck.  Yellow cards are the most reliable for leaves, so you probably want to tuck those first and splay right yellow.  Your best case scenario is tucking Agriculture, Machinery, Medicine, and Anatomy; with your initial Fermenting, Clothing, Pottery and Reformation on top you’ll now have 16 leaves.  Even if you don’t make it to 16, even a few tucked yellow cards should turn Fermenting into a monster.

It is personal preference whether you tuck twice; a second tuck can help you get Monument and also protect you symbol-wise (e.g., vs Gunpowder or Compass).  It slows you down but is somewhat safer.  Anything more is probably overkill and too slow, because as you see …

The main pitfall of the combo

I have mentioned several times the efficiency of “fast drawing” for Fermenting.  The main drawback to the combo is tempo; as you keep drawing, you aren’t doing any scoring until you get to the “X”, the combo clincher.  At the same time, you are emptying the piles and teching up your opponents.  Your opponent might be scoring and achieving in the meantime; this is why I keep mentioning the efficiency of drawing, as you need to find the “X”, the kicker, before your opponent gets too many achievements.

The “X”

What do you do with all those cards in your hand?  There are a few things you can do with them, and a few key cards to look for:

Bicycle
This is the best possible “X”.  You exchange your hand and score pile and usually get over 100 points in doing so.  If you land this, you sometimes don’t even need to achieve; you can just draw out with Fermenting and win with a higher score.

Lighting
Lighting isn’t as fast as Bicycle, but still very strong.  Although it won’t give you an absurd score, if you hadn’t picked up Monument, this will help you get it.  And you should have enough cards of different values to consistently score 21+ points per action with this.

Suburbia
Another very strong “X”, but it comes later in the game when dangerous cards like Composites arrive.  But the fact that you score 1′s can help it empty piles just as fast as Fermenting.  Unlike Bicycle, it will end the game while scoring a ton: with a big hand, it may as well just read: “[Leaf]: Win the game.”

Stem Cells
Like Bicycle, but it melds over your Fermenting with no new way to draw and comes super late.  Still nice, but definitely the others are preferable.

Collaboration
Strange way to end the game.  Collaboration ends it directly once you get to 10 green cards, and if you draw enough Reformation can meet that requirement easily.

Similarly, if you need a game-ender, Measurement can be used on any very large pile to attempt to draw an 11.

Stopped before Age 7?

All of the above cards are Age 7 or higher.  What happens if you were stopped at Age 4 or Age 5, with Gunpowder or Compass?  Here are some lower-age ways to deal with a big hand:

Currency
A card I like to keep in hand while using Reformation, rather than tuck.  It is the “tricycle”: a Bicycle junior.  It can score pretty well with all the different cards in hand, though you’ll have to return different values.  Maybe a better term would be “Candle”, since it’s sort of like a more primitive form of Lighting.

Coal
One of the top Age 5 cards.  It wrecks your board, but who cares?  Reformation supplied it with plenty of fuel.  Its main advantage is that the “Draw and tuck a 5″ eventually becomes a “Draw and meld a 5″, which can help you get higher top cards while simultaneously scoring.  Normally when going for achievements you have to do three things at once: score, tech up, and achieve; Coal can do the first two simultaneously.

Perspective
This covers up Fermenting, but probably if you still have Fermenting you wouldn’t be using this anyway.  It can let you score quite a bit from your hand if you tucked enough lightbulbs with Reformation.

Canal Building

If the circumstances are favorable, you could use Canal Building to score a lot of 4′s or 5′s from your hand.  This is a lot harder to set up than Bicycle or Currency, though.

What if I can’t find any “X”?

Well, there are many other things you can do with so many cards.  You increase your chances of finding powerful cards, and you probably have a big symbol advantage (especially if you splayed more).  So feel free to take this combo into another direction.  Just keep in mind that a good opponent up against Fermenting/Reformation has probably gone for fast scoring / achievements, so you don’t have that much time to dally around.

How to counter the combo

The key to F/R/X is to draw tons of cards, then at around Age 7 win the game.  How do you beat this?  Tempo.  You have a big disadvantage in the later ages, so beat them early on!  You won’t need to tech, because Fermenting will clear piles for you.  As a result, “draw and meld” cards like Sailing and Experimentation become very useful.

1. Board-destroying

Fermenting is the key to the whole combo.  If you can knock it out with Engineering, Compass, Monotheism, or Gunpowder, you’ll cripple them. Compass in particular can handle both Fermenting and Reformation, and if set up correctly, can hand them absolute junk at the same time.  It is the ultimate counter to F/R/X.

These attacks often fail if Reformation tucks enough symbols.  At that point, you can share lots of forced meld effects.  Sailing / Experimentation, if they have enough Crowns/Lightbulbs, can disrupt their board and hopefully overmeld their key cards.  (As mentioned before, these cards are important anyway because they serve as quasi-techers once Fermenting clears out all the piles.)

2. Hand-destroying

Late in the game, Composites will absolutely ruin Fermenting.  But that’s about it — Explosives doesn’t help quite enough and good luck trying to use Refrigeration against the leaf madness.  Classification is a more subtle way of stealing cards from their hand — though it’s a bit worse when they can share.

A better way of approaching this is by sharing.  A shared Railroad can make a F/R/X player cry.  Alternatively, a shared Alchemy or Physics might prove lucky for you, and besides, there’s not much downside to giving another 3 cards to someone drawing 10 cards per turn anyway.

In a last-ditch scenario, you can use Fission to try and detonate the game before they get to execute their “X”.  This is especially handy if you picked up some earlier achievements while they didn’t.

3. Leaf-blocking

Very early on, you can try to stop them by matching them in leaves.  This is somewhat hard to do if they have a lot of leaves, as there are only so many early leaf cards, but your advantage is Agriculture, a card they can’t meld.  For example, Fermenting, Clothing and Calendar can be matched by Agriculture / Pottery.

4. Scoring

If you can’t attack them, beat them with score as fast as you can. Early scoring obviously helps if you already got a couple achievements, but the factory dogmas like Coal, Canning, and Machine Tools are surprisingly efficient (especially if the piles are cleared away).  Again, don’t bother with teching — barring some miraculous Printing Press shenangians, it is quite impossible for you to get ahead of the tidal wave that is Fermenting.

Posted in Uncategorized | 5 Comments

Age 2 Tier List

Previously:


This article incorporates analysis from BitTorrent.

All cards in Innovation serve some purpose. Some, however, are more powerful in more situations, and others are less powerful in fewer situations.

This ranking attempts to categorize every base Innovation card into four “tiers”. Although every game is unique, and different cards are more important at different times, this ranking considers each card’s average utility in the average 2-player base game. It asks, “How often do I prefer to draw this card, as opposed to my opponent, and how important is that to me?” Sometimes, the most important card for you to draw is Feudalism. Usually, it’s something else.

Top Tier: These are cards to actively seek out because they can form the backbone of your tableau. They are real gamechangers, and almost always either very helpful to you, or very important to deny to your opponent. If the icons permit it, you’d like to use these dogmas as much as you can.

High Tier: These are cards that you are quite happy to draw. They might be a bit more specialized than “top tier” cards, or they might lose their value faster, but they are still important and you would much rather see them on your board instead of your opponent’s. Their dogmas are likely almost always preferable to the basic actions (e.g., drawing), often because they are strictly superior.

Mid Tier: These are solid cards that are OK to meld onto your board, but not part of a long-term plan. Their dogmas aren’t especially powerful, but still better than the basic actions. Mostly they are vehicles to more powerful cards.

Low Tier: These cards are rarely, if ever, useful. Their icons are probably their most redeeming factor, as their dogmas are either extremely specialized or all-around weak, barely better (or sometimes even worse!) than the basic actions. They are the first ones to be returned, and you are probably happy to meld this onto your opponent’s board instead of yours.

Note that not every Age has an equal number of cards in each tier. Within each tier, the cards are only very roughly ordered, as individual circumstances at that point far outweigh the differences in the cards.

Top Tier

Fermenting
Mathematics

Fermenting is on top here by quite a bit, being the only card with virtually unlimited draw ability. It’s a powerful way to search for cards if you have leaf support — in particular, Fermenting with early leaves (usually Pottery and/or Clothing) is a great way to find Reformation, a powerful combination. Fermenting draws you cards for Reformation, which then tucks those cards while splaying right the two colors with the most leaves, thus further powering up Fermenting. The key to the combo is finding something to do with all those cards: Reformation and Bicycle are by far the best, but in a pinch Classification, Lighting, Socialism, Suburbia, Stem Cells, and even Currency are fine ways to make use of large hands.

Keep in mind that it is vulnerable to Gunpowder, but with its draw you might have better odds of grabbing Gunpowder in the first place.

Of course, if you don’t have many leaves, it’s not very helpful but still useful to keep away from a more leafy opponent, leaves being as important as they are. In the late game, when both players have lots of leaves thanks to splay, a shared Fermenting can provide an unexpected game end.

Mathematics is the most reliable and long-term teching card in the game; all others are either more situational or obsoleted more quickly. Plus, it is extremely effective when shared because the sharing bonus is at your new tech level, ready to be Mathed for a double tech jump. As a bonus, it is a useful game end mechanic if you use it to return a 10.

However, it veers close to falling out of this tier, mainly because teching up is often a trap compared to fast early scoring. I would much rather be catching up in tech than in score/achievements, as there are far more cards that help you catch up in the former.

In general, Mathematics is best when the supply pile of the Age you are leaving is still quite full. It is usually pointless, for example, to Math from Age 4 to Age 5 if there is only one card left in the Age 4 deck.

  • Using Mathematics to go from Age 2 to Age 3 is pretty useless as Age 3 is not that much better than Age 2;
  • Age 3 to Age 4 is quite powerful;
  • Age 4 to Age 5 is good only if you are OK with the possibility of melding Physics/Chemistry and being stuck there. If you don’t want to meld those (e.g. your opponent has Machinery, or you have no score pile), reconsider.
  • Age 5 to Age 6 is extremely powerful;
  • Age 6 to Age 7 is not as useful, mainly because of how strong Age 6 is;
  • And Age 8 and upwards is usually worth it, if only because dogmas are so powerful that the tempo gain from Mathematics is far better than just drawing.

Remember that just because you have Mathematics doesn’t mean you have to tech it up to 10! Mathematics helps you find a game-winner. It does not win you the game.

High Tier

Road Building
Monotheism
Mapmaking
Calendar

Road Building is a deceptively useful card:

  • It lets you screw with your opponent’s board. I prefer to hand over a red card other than Road Building itself, since otherwise they will just send it right back (and Road Building is also a useful card to have). So this is a good reason to hang onto a useless card like Oars so you can use it to cover their Gunpowder while you take their Paper. Keep in mind that it works both ways. You use it to both steal good cards for yourself and also cover up good red cards for them.
  • It lets you meld multiple cards at once. This is a very rare dogma effect and a useful way to make use of a big hand.
    • In particular, it is a great way to set up attacks in a symbol: you can execute Road Building on your first action to meld both the attack (e.g., Vaccination) and extra symbols needed for the attack (e.g., Reformation), and on your second action be able to use your attack immediately (Vaccination to deny a crucial achievement claim, just in time)
  • If shared, Road Building is a forced meld so you might be able to force your opponent to meld something undesirable if he has a small hand.

Monotheism is a devastating attack that is somewhat hampered by the need to be missing colors. It is an especially nasty surprise later in the game if you have cannibalized your board for points with something like Coal. It is a secret counter to Gunpowder: if you have a tower lead and Gunpowder destroys your reds, then Monotheism takes away his Gunpowder. For this reason it is sometimes worth holding in your hand for a surprise meld and execute. Finally, remember that a shared Monotheism is like a reverse Mysticism (draw a card, if it is not a color match meld it, otherwise tuck it, then draw another one for letting your opponent tuck a card), useful if you have few colors and they have many.

Mapmaking is a lot like Gunpowder directed at score piles. The real purpose isn’t the first step of the dogma; the points are in the second step when the lower supply piles are empty, so you’re really scoring a 1 + 3 or 1 + 4. It is one of the best ways to stop a runaway scorer who got lucky with Clothing or Metalworking, because you are simultaneously scoring big for yourself while raiding their score pile. It also sort of works with Optics (transfer them 1′s, then take them back with a bonus).

Calendar is basically The Wheel, except it has a prerequisite that is easily satisfied if you have done a bit of early scoring. As a bonus, if drawn early enough, it is a mild techer. It works well with Currency.

Mid Tier

Construction
Currency

For most players, the purpose of Construction is the Empire achievement. It’s a fine way to claim the achievement, further incentivizing you to build out your board if Clothing didn’t do so already.

The “main” purpose of the card is to rob your opponent, since you get two cards while he loses a net of one. One of the best times to execute Construction is when your opponent has 3 cards; use it twice and you steal his whole hand, leaving him only a random Age 2 card. Remember it is always better if you leave something random to your opponent, instead of something he intended to save. In this case, if you only dogma once, he can save a desired card, which might be crucial to their plan. It is better to leave them something random, something they could not have possibly planned to keep.

This is also why Construction isn’t ranked higher — once your opponent has more than a few cards, you’re really getting only the dregs from his hand. You are taking two cards from them, sure, but you are certainly going to be getting the two worst cards, while if the piles had emptied he might be drawing a 4 or 5 as compensation, so the exchange might end up benefiting him.

Currency becomes significantly stronger later, once you are able to get together a big hand. It is one of the first effective ways to cash in a big hand. There are very few green or crown scorers, and it scores very effectively once some piles are empty.

You can score 5 points if ages 1 and 2 are empty while you return a 1 and a 2, and you can score 13 points if ages 1-3 are empty while you return a 1, 2, 3, and 4. These 2 are the most important to remember as the first gives you enough points for the next achievement, and the second one gives you enough points for 2 achievements.

Low Tier

Philosophy
Canal Building

Philosophy is mostly useful as a purple source of three lightbulbs, very important if you are contesting that icon. Otherwise it does two rather mediocre things that rarely synergize with each other. Of course, when desperate, Philosophy is still a scorer, albeit one of last resort, and similarly can be very helpful for Paper or Invention.

Canal Building is a scorer, but somewhat tricky to line up. You’d think it’d work well with Fermenting, but in practice it’s too tricky to get just the right number of highest cards (and covering up your Fermenting hurts). Physics works well with it, and in any other situation where you happen to have a lot of the highest card in your hand, you may as well go for it. But I rarely build deliberately for it.

Posted in Age Overview | 5 Comments

Age 1 Tier List

All cards in Innovation serve some purpose. Some, however, are more powerful in more situations, and others are less powerful in fewer situations.

This ranking attempts to categorize every base Innovation card into four “tiers”. Although every game is unique, and different cards are more important at different times, this ranking considers each card’s average utility in the average 2-player base game. It asks, “How often do I prefer to draw this card, as opposed to my opponent, and how important is that to me?” Sometimes, the most important card for you to draw is Feudalism. Usually, it’s something else.

Top Tier: These are cards to actively seek out because they can form the backbone of your tableau. They are real gamechangers, and almost always either very helpful to you, or very important to deny to your opponent. If the icons permit it, you’d like to use these dogmas as much as you can.

High Tier: These are cards that you are quite happy to draw. They might be a bit more specialized than “top tier” cards, or they might lose their value faster, but they are still important and you would much rather see them on your board instead of your opponent’s. Their dogmas are likely almost always preferable to the basic actions (e.g., drawing), often because they are strictly superior.

Mid Tier: These are solid cards that are OK to meld onto your board, but not part of a long-term plan. Their dogmas aren’t especially powerful, but still better than the basic actions. Mostly they are vehicles to more powerful cards.

Low Tier: These cards are rarely, if ever, useful. Their icons are probably their most redeeming factor, as their dogmas are either extremely specialized or all-around weak, barely better (or sometimes even worse!) than the basic actions. They are the first ones to be returned, and you are probably happy to meld this onto your opponent’s board instead of yours.

Note that not every Age has an equal number of cards in each tier. Age 1, for example, has a rather lopsided distribution. Within each tier, the cards are only very roughly ordered, as individual circumstances at that point far outweigh the differences in the cards.

Top Tier

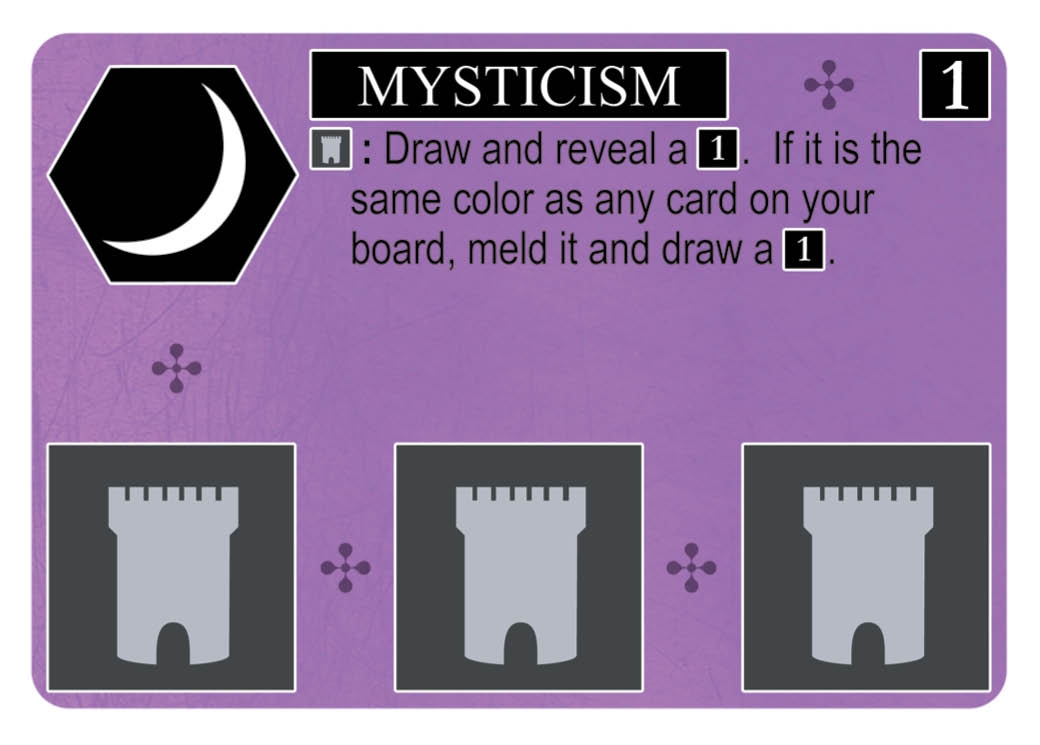
Mysticism
Metalworking
The Wheel
Sailing
Clothing
Pottery
Domestication

The precise order of these cards is subject to disagreement, but there is no question that these seven cards stand head and shoulders above the rest of Age 1. They can be roughly categorized as such:

Useful now Useful later
Scoring Metalworking, Clothing Pottery, sometimes Metalworking
Board-building Sailing, Domestication Mysticism, Sailing
Hand-size The Wheel Mysticism, The Wheel, Metalworking

Note that Mysticism and Metalworking appear in multiple categories: Mysticism simultaneously builds your board and your hand, while Metalworking simultaneously scores and builds your hand (with the added bonus of drawing non-castle cards).

The only one of these cards that really needs support is The Wheel, since all it does is draw you cards and you probably want to do something with those cards. But it’s a great support card and still useful later on.

Finally, note that although Domestication is superficially quite similar to Sailing, it ranks lower for a few reasons:

  1. It is less useful later on when you have unwanted 1′s in your hand;
  2. Being forced to overmeld Domestication (with Agriculture, perhaps) is much more painful than overmelding Sailing, because all of the Age 1 green cards are fantastic; and
  3. It is less easy to share it vindictively, as your opponent needs a bad low card in hand to be hurt by the forced meld.

That being said, Domestication is certainly a better way of melding the cards in your hand and offers more control over what gets melded.

High Tier

There are no Age 1 cards here, since none of the Mid Tier cards are really comparable to the Top Tier.

Mid Tier

Tools
City States
Masonry
Archery
Agriculture
Code of Laws

Of these, Tools and City States are probably the closest to being promoted to High Tier. Tools is a tempting tech jump, but there’s simply not enough in Age 3 to justify leaving all of Age 1 and Age 2 to your opponent. Using Paper to jump to Age 4 and meld Gunpowder is a real game-changer, but Age 3 by itself is probably not worth it unless the rest of your Age 1 hand is even more bleak. In such situations, I tend to draw for Tools, and if I still can’t find anything then I’ll jump to Age 3 and hope for something good.

City States is a nice hold-in-your-hand surprise for your opponent, ideally to grab one of the above Top Tier cards. Archery is similar, but for catching up in tech, and so suffers because there are a lot more ways to catch up in tech than in board power.

Masonry is useful only for Monument, but the pitfalls of that have been described earlier. Agriculture has lovely icons but is severely outclassed by Pottery until quite a bit later in the game. (Plus, its icons are in the wrong color.) And Code of Laws segues perfectly into Paper, except, you know, you can’t count on actually drawing Paper. Still, it does build your board, even marginally, and the tuck alone is sometimes (though rarely) worth spending an action.

Low Tier

Writing
Oars

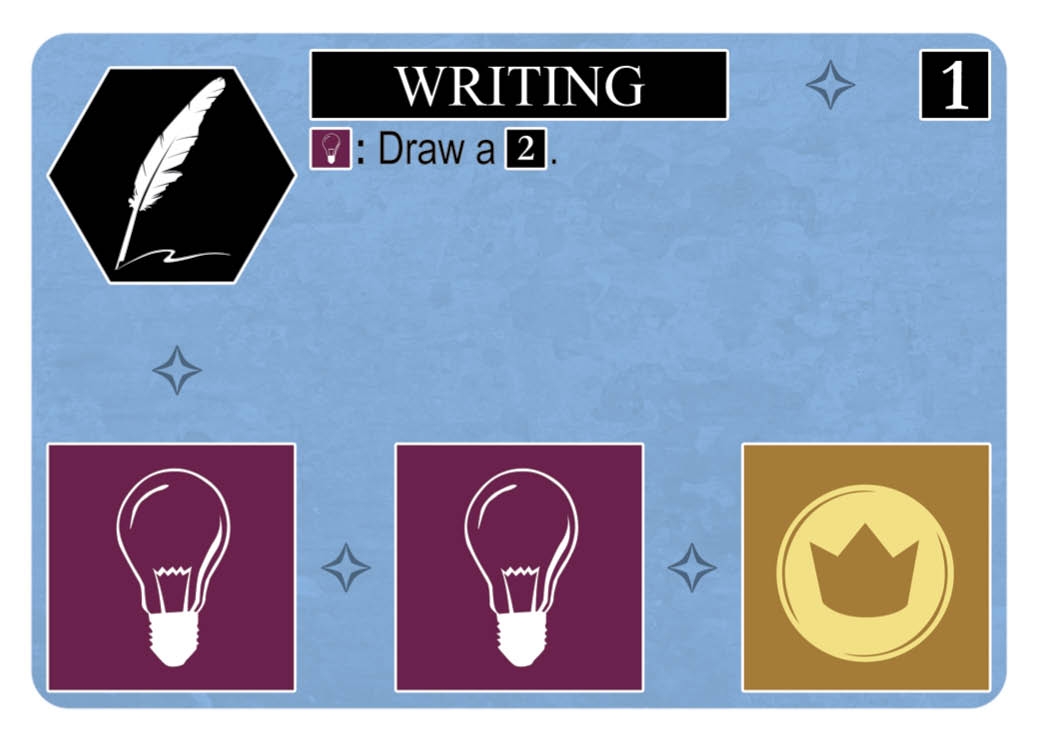
These cards are actually most useful if you can share, since then you’re drawing two cards instead of one. Otherwise they are extremely weak, useful pretty much only for their icons (and even then, they are unspectacular). There aren’t enough good cards in Age 2 to justify Writing (which is essentially just a draw action), and it expires stupidly fast. And the Oars attack is perhaps only useful in the late game if you somehow know exactly that they have a big card with a crown on it. Compared to the other things you could be doing, it’s just not worth keeping on your board.

Posted in Age Overview | 4 Comments

Advanced Mechanics: Icon Surge

This is a featured forum article by BitTorrent.

Consider only the base game.  Each card gives you 3 icons. Assuming you don’t have any splays, 5 top cards would give you a total of 15 icons.

But since your opponent can also get 5 top cards, how do you get a lead in a particular icon?

This is all about icon surging.

Let me back to the basics first. Each color has a featured icon which the majority of the cards are related to that icon. Castles and Factories for red, Leaves for yellow, Bulbs for blue, Crowns for green. Purple is the funny one which consists of a few of each type of icons (and serves as a wildcard, more later on that).

So if you have a lack of leaves, usually what you want is not a yellow card with leaves (unless you have an unusual yellow card without leaves).  There are a lot of those, and they are fine to tuck if you have a splay, but what you really want is something other than yellow with leaves, like Pottery from blue or Clothing from green. That is, a wildcard rather than the mainstream card.

In order to do proper surging for each of the 6 icons, you have to know all the exact icons of all the cards. Really. Or, read my general guidelines below:

Castle

Red is the major powerhouse of castles while purple helps a lot too, which means that anything rather than red and purple will provide the extra castle you want. Masonry and The Wheel are very annoying since it gives a lot of extra castle you want with some good dogmas bounded with it. Alchemy sometimes serves well, too.

Leaves

Yellow is very concentrated with leaves, while other colors do not consist of much leaves with a very sparse patten. Pottery is extremely deadly as a wildcard and Reformation is very helpful as well. Note that red card do not give leaves, and green cards never give you 3 leaves (actually only 1 green card gives you 2 leaves: Clothing).

I even say that Fermenting/Reformation is not the right term; it should be known as Fermenting/Pottery or Fermenting/Calendar which provides a huge surge of leaves and makes ramming for the Reformation possible.

Crowns

This one is rather complicated. Green owns the most crowns but there are wildcards in all 4 other colors and in basically all ages, except Ages 9 and 10. Wildcards are: Optics, ~The Pirate Code, Combustion, and Flight in red; Canal Building for yellow; Translation and Encyclopedia for blue (very important as they are three crowns); Code of Laws, City States, Enterprise, and Societies for purple. Mastering crowns are hard since overuse of crowns will make your board become dull, though. (I can write another 2 or 3 articles related to it, really)

Bulbs

Blue cards contains most bulbs, while the most famous wildcards are Philosophy and Education from purple, Classification, Paper, Invention and Measurement from green and Perspective from yellow. It is rather straightforward for bulbs.

Factories

Red consists of most of the factory cards, including the famous Industrialization. Now in order to make sure you dominate in factories, there are Chemistry in blue, Steam Engine and Canning from yellow, Emancipation from purple and Electricity/~Corporation from green. Sometimes the 1 factory icon from Invention helps a lot, too.

Clocks

This one is rather rare, since only a few cards have clocks printed on it even in the later stages. While 5 out of 6 blue cards from Age 8 contains a majority of clocks, the first clock base card is the Railroad from Age 7. Another color with impact on clocks are green cards: Satellites and Databases would provide 3 clocks, while Bicycle, Mass Media and Collaboration provide 1. But then, to be honest, if you have to get a clock surge, you better splay some of your colors up/right, which will be way better.

So when you are working on card counting, try to bear in mind of all these cards so you will know when your opponent can get some extra icons from nowhere or when can you benefit from it.  Everyone knows that the key to icon dominance is to have the icon’s color splayed, but just as important is to identify these wildcards so you can get a relative advantage over your opponent in that icon.

Posted in Uncategorized | 3 Comments