Entries from July 2010

July 30, 2010

Stampin' Up! New Catalog Blog Hop!

Welcome to  Stop 19 on the Stampin’ Addicts New Catalog Mega Hop!    Stampin’ Up’s  new catalog is here and this hop is rockin’ with some really great projects using the new stamp sets!  If you’re going forward’s through the hop, you just saw all the cool things Cheryl did with Friends Never Fade.     I’ve been playing with Cottage Garden.  It’s a neat set with a matching designer series paper.

My first project is a cute little thank you card with a matching milk carton.  You can fill the milk carton with M & M’s or another favorite treat! It’s so summery and bright.

Photobucket

I can’t remember who told me about using a scallop circle to close the milk carton die – but it’s such a wonderful idea that I had to try it!  It’s hard to see in the picture, but I embossed the green scalloped circle that is holding the carton closed as well.

And here’s a quick tip for you:  I always have trouble getting the plastic layer off my sticky strip.  I started using either my paper snips or my paper piercer.  I just slide the tip under the edge of the plastic and continue sliding the length of my cut off piece.  And easy peasy, that piece is removed and I’m ready to stick something together!

Recipe:

Stamps:  Cottage Garden,  Occasional Quotes

Paper:  Pear Pizzazz, Daffodil Delight, Whisper White and Peach Parfait card stock,  Sunny Garden Designer Series Paper

Ink:  Poppy Parade, Blushing Bride, Peach Parfait, Pear Pizzazz

Accessories:   Petals-a-Plenty Embossing Folder,  Scallop Circle Punch,  Large Tag Punch, 1/8″ Daffodil Delight Taffeta Ribbon

Next up -  A beautiful thank you card – if I do say so myself.

Photobucket

This is such a simple design, but I think the colors make it seem really rich. I had intended to do a monochromatic card using Marina Mist and Bashful Blue until I looked in my paper drawer and I only had scraps left of Marina Mist.  Time to place another order!    Anyway, I had to make some adjustments to my plan, but I really like how it turned out.  The Concord Crush was embossed using the Polka Dot Embossing Folder.   I seem to be on an embossing kick lately!

Recipe:

Stamps:  Cottage Garden, Because I care

Paper:  Concord Crush, Bashful Blue, Marina Mist and Whisper White card stock

Ink:  Marina Mist, Concord Crush

My last project is another card – I was trying to think outside of the box a bit  and came up with this. . . .

Photobucket

What do you think?  My DH thinks it’s a bit dark, but I think I like it.   It won’t quite count as masculine – but I do like this color combination for a man for sure.  Yep, I did it again.  I don’t think I can make a project right now that doesn’t include some embossing some where.  In this one, it’s just the Early Espresso layer that’s embossed.  I think it adds some nice texture without overdoing it.  My favorite way to apply these rhinestone jewels is using my paper piercer.  I slip the point under the edge to pick it up and lay it where I want on my project.  Works perfectly for me every time!

Recipe:

Stamps:  Cottage Garden

Paper:  River Rock,  Early Espresso, and Cherry Cobbler card stock

Ink:  Early Espresso

Embellishments:  Basic Rhinestone Jewels,  Square Lattice Embossing Folder

Accessories:  So Saffron Flower Brads (from the subtles pack), Scallop Oval Punch, Oval Punch, Polka Dot Embossing Folder.

Well, my time’s up.  I hope you’ve enjoyed seeing some of what you can do with Cottage Garden!  It’s time to send you  to the next stop, which is Joyce who has made some great projects using a set called Just Believe which I think may be my next new favorite stamp set!   Let me know what you think and I’ll see you next time!

Click Here to go to Joyce’s Blog!

July 26, 2010

Charming Girls Update

I’ve made quite a bit of progess on my goals!   And I’m changing – I mean adjusting my plan.  That’s allowed right?  If there’s no status written beside the goal, then it’s still just like it was when I posted my goals.

Here’s the original goals I posted:

1.  Have a new blog post every week!  (I can do this really – I know I can!) – Status:  Success so far and I’ve got blog project posts written and scheduled for every Monday through Aug 23!

2. Finish all my July Swaps -  Big Shot Fabric Swap (5 mini rag bags)  and  New SU Catty Swap (6 cards).  Status:  DONE!!! And they will be posting to my blog in the next few weeks!

3.  Create my projects for the New Catty Blog Hop (4 papercrafting projects).  Status: DONE!!  And early!   Everything’s all ready for this weekend’s blog hop!

4.  Make the Quilt Top for Brady’s quilt.  Status:  I’m moving this one to Sept -  I misplaced the pattern and had to reorder it (as a back issue) so it’ll take 6 to 8 weeks to get here.  In the meantime, I’m starting on a new super secret quilt project – just can’t say who it’s for cuz it’s a BIG surprise! But the fabric just got here today.  I can’t wait to start cutting!

5.  Complete the Verna Quilt top.

6.  Make Sadie a new dog bed.

7.    Spend a Saturday with the girls. Status:  I went out with the girls Saturday night and tomorrow I’m going out with the girls again!  Yay for me!

8.  Make some time for me – to read and enjoy it.  Status:  I read Iris Johansen’s newest book cover to cover yesterday.  It was awesome to sit on the couch and read.  HEAVEN!

9.  Go to a movie with my hubby – because he likes doing that.

10.  Start working on my Christmas cards – make 15 this month.

11.  Make a new tree skirt – if I can get to it!

Summertime. . . . And the livin' is easy. . . . .

It’s July in the South, which means lots of hot weather,  flowers, and in my family. . . birthdays. .   Of course, I turned to my newest go to set -  Awash with Flowers for this one.

ImageBam image upload

It’s a variation of a previous card – but I love these colors!

Cardstock:  Perfect Plum, Wild Wasabi, Whisper White

Ink:  Perfect Plum, Wild Wasabi, Whisper White Craft Ink

Embellishments:  Circle Ice Rhinestone Brads,  Scallop Oval Punch,  Med Oval Punch, Small Oval Punch

July 19, 2010

What? Fabric on a card? You must be joking. . . . .

I think it’s pretty obvious, that I’ve developed a love of fabric recently. I was hopping around checking out some of my favorite quilting blogs and I saw this wonderful way to use fabric on a card.  I just had to try it.

I wanted it to match Quilt # 4 so I used the leftover scraps from the quilt to make this card.
I think it’s so cute!   And what a great idea – to match the card to the quilt.
ImageBam image upload

I used a crumb cake card base to attach the fabric to.  Then I decided I didn’t like the stitching showing on the inside, so I covered the inside with chocolate Chip Cardstock.  I layered very vanilla on top of the chocolate chip and stamped a sentiment from the new hostess set Occasional Quotes and used the flowers from Because I care, another new hostess set, for accent.

imagebam.com

Sorry about the message written on it – I forgot to take a picture until after I signed the card. . . . .  It was one of those days.

July 18, 2010

Charming Girls Quilt Club

As some of you may know, I started quilting earlier this year.   I’m having such a good time doing it that I decided to join the Charming Girl’s quilt club.   I really like that this more than just quilting or crafting.  It’s also about  growing  as people and  building relationships.  It’s about setting goals and doing your best to meet them.  And for July and August, it’s also about taking care of ourselves.

So my goals for July and August are below:

1.  Have a new blog post every week!  (I can do this really – I know I can!)

2. Finish all my July Swaps -  Big Shot Fabric Swap and  New SU Catty Swap.

3.  Create my projects for the New Catty Blog Hop.

4.  Make the Quilt Top for Brady’s quilt.

5.  Complete the Verna Quilt top.

6.  Make Sadie a new dog bed.

7.    Spend a Saturday with the girls.

8.  Make some time for me – to read and enjoy it.

9.  Go to a movie with my hubby – because he likes doing that.

10.  Start working on my Christmas cards – make 15 this month.

11.  Make a new tree skirt – if I can get to it!

July 11, 2010

A great quilt for a wonderful girl!

So,  I finished the quilt I had been working on for a young lady that is very dear to my heart – I really love how this turned out.  I made it using the High Light pattern and the Kiwi line from Timeless Treasures.   It’s my first masterpiece.  I’m really proud of it!

Here’s the front of the quilt:

imagebam.com

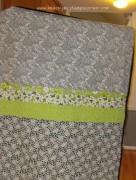
I added 3 “stripes” that had the lime green color across the back for interest.  Here’s a close up of that.

imagebam.com

And here’s the wonderful young lady that I made this quilt for – Isn’t she a doll!
imagebam.com
Thanks for  stopping by  – I’m going to be trying to have a new post every Monday -  so check back next week for a new project!

July 4, 2010

Woo Hoo – quilt #4 is done!

I guess it’s about time for me to stop numbering my quilts since I don’t finish them in the order I start them!  And, before long it’s going to be hard to continue keeping count.

I made this using the Easy Does It pattern by Darlene Zimmerman.  The fabric is Heart and Soul by Whimsicals for Red Rooster Fabric.    The only modification I made to the pattern was the addition of 2 butterflies that I appliqued to the back after cutting them out with my Big Shot and the Beautiful Butterflies die.  And I chose to make a patched binding instead of all one color. . . .

Here’s the front of the quilt. . . .

Front of Heart and Soul Quilt

Here’s a shot of the back where I added the butterflies. . . .

Back of Heart and Soul quilt

And here’s a close up of one of the big shot butterflies. . . .

Butterfly close up

July 2, 2010

Preview of my latest projects -

So I’ve been working on a quilt for a very special young lady named Sarah -  I don’t have a picture ready of the finished quilt (cuz it’s not quite there, but I do have this picture of the quilt top.

Sarah's Highlight Quilt

I think it’s just gorgeous!  It’s quilted now and the only thing left is to add the binding!  I’m hoping to finish it this weekend!

And here’s the other quilt I’ve been working on – the quilt top is done, I just need to quilt and bind it.

Whisper Quilt

Next up is to finish these to quilts and start working on some swaps that I’m committed to – one of which is for convention.  Time to get busy!!!

Thanks for stopping by!